Using webhooks with your flows

Webhooks can be an incredibly useful tool in the world of ETL (Extract, Transform, Load). They are especially handy when working with orchestration tools like Airflow or DBT Cloud, helping to seamlessly coordinate data flows. Beyond just transferring data, webhooks can play a crucial role in monitoring. You can use them to get timely updates, whether your data syncs are successful or if there's a hiccup along the way. In this post we're going to show you how to create and manage webhooks in Portable.
Getting Started with Webhooks
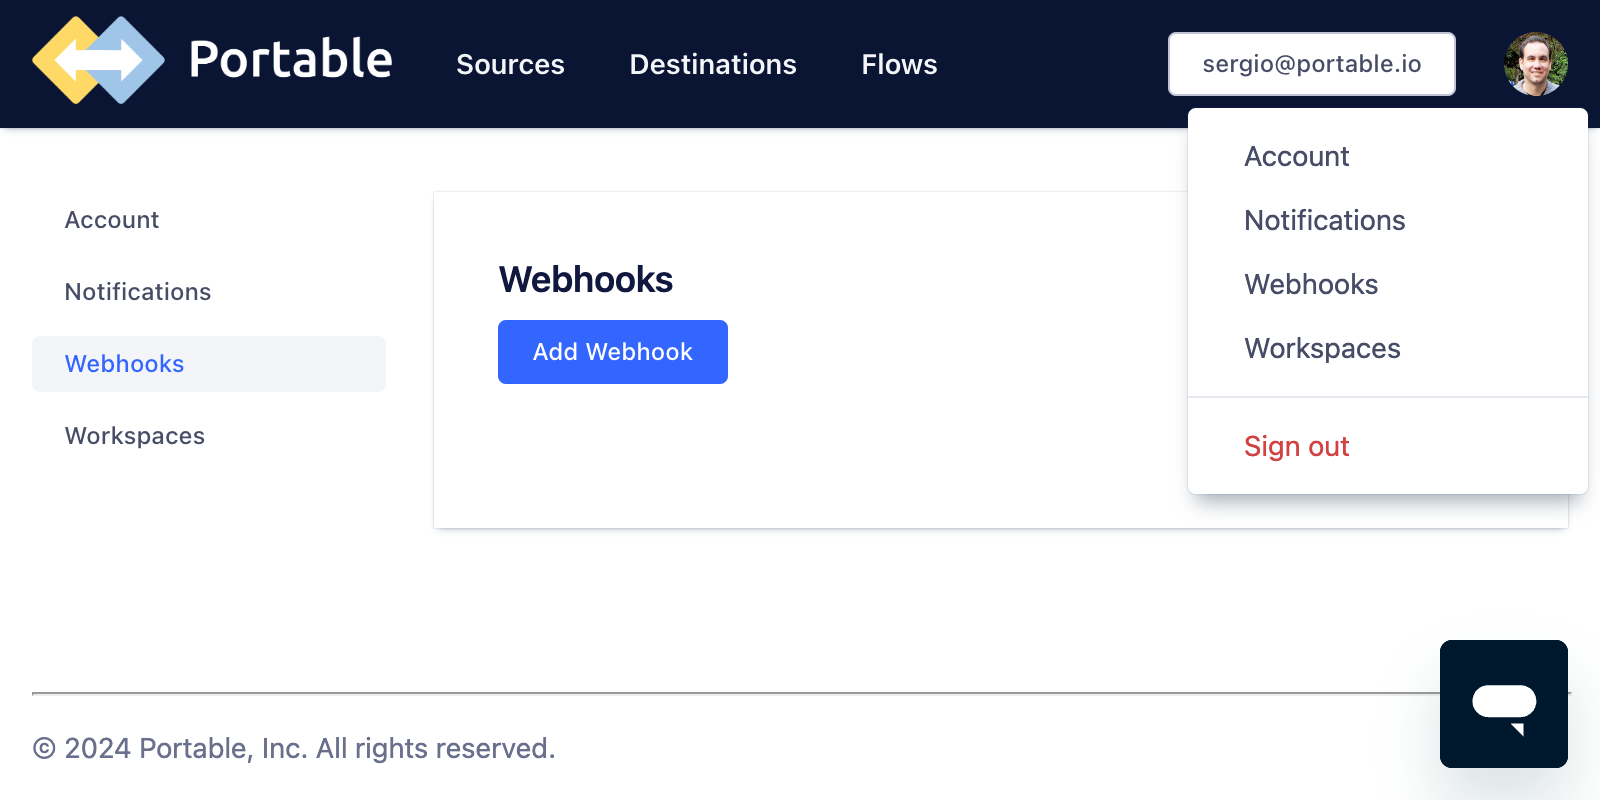
Let's set up a new webhook in Portable. Log into Portable and go to the Webhooks settings page by clicking on your avatar at the top right and selecting Webhooks from the menu. You should see something like this:
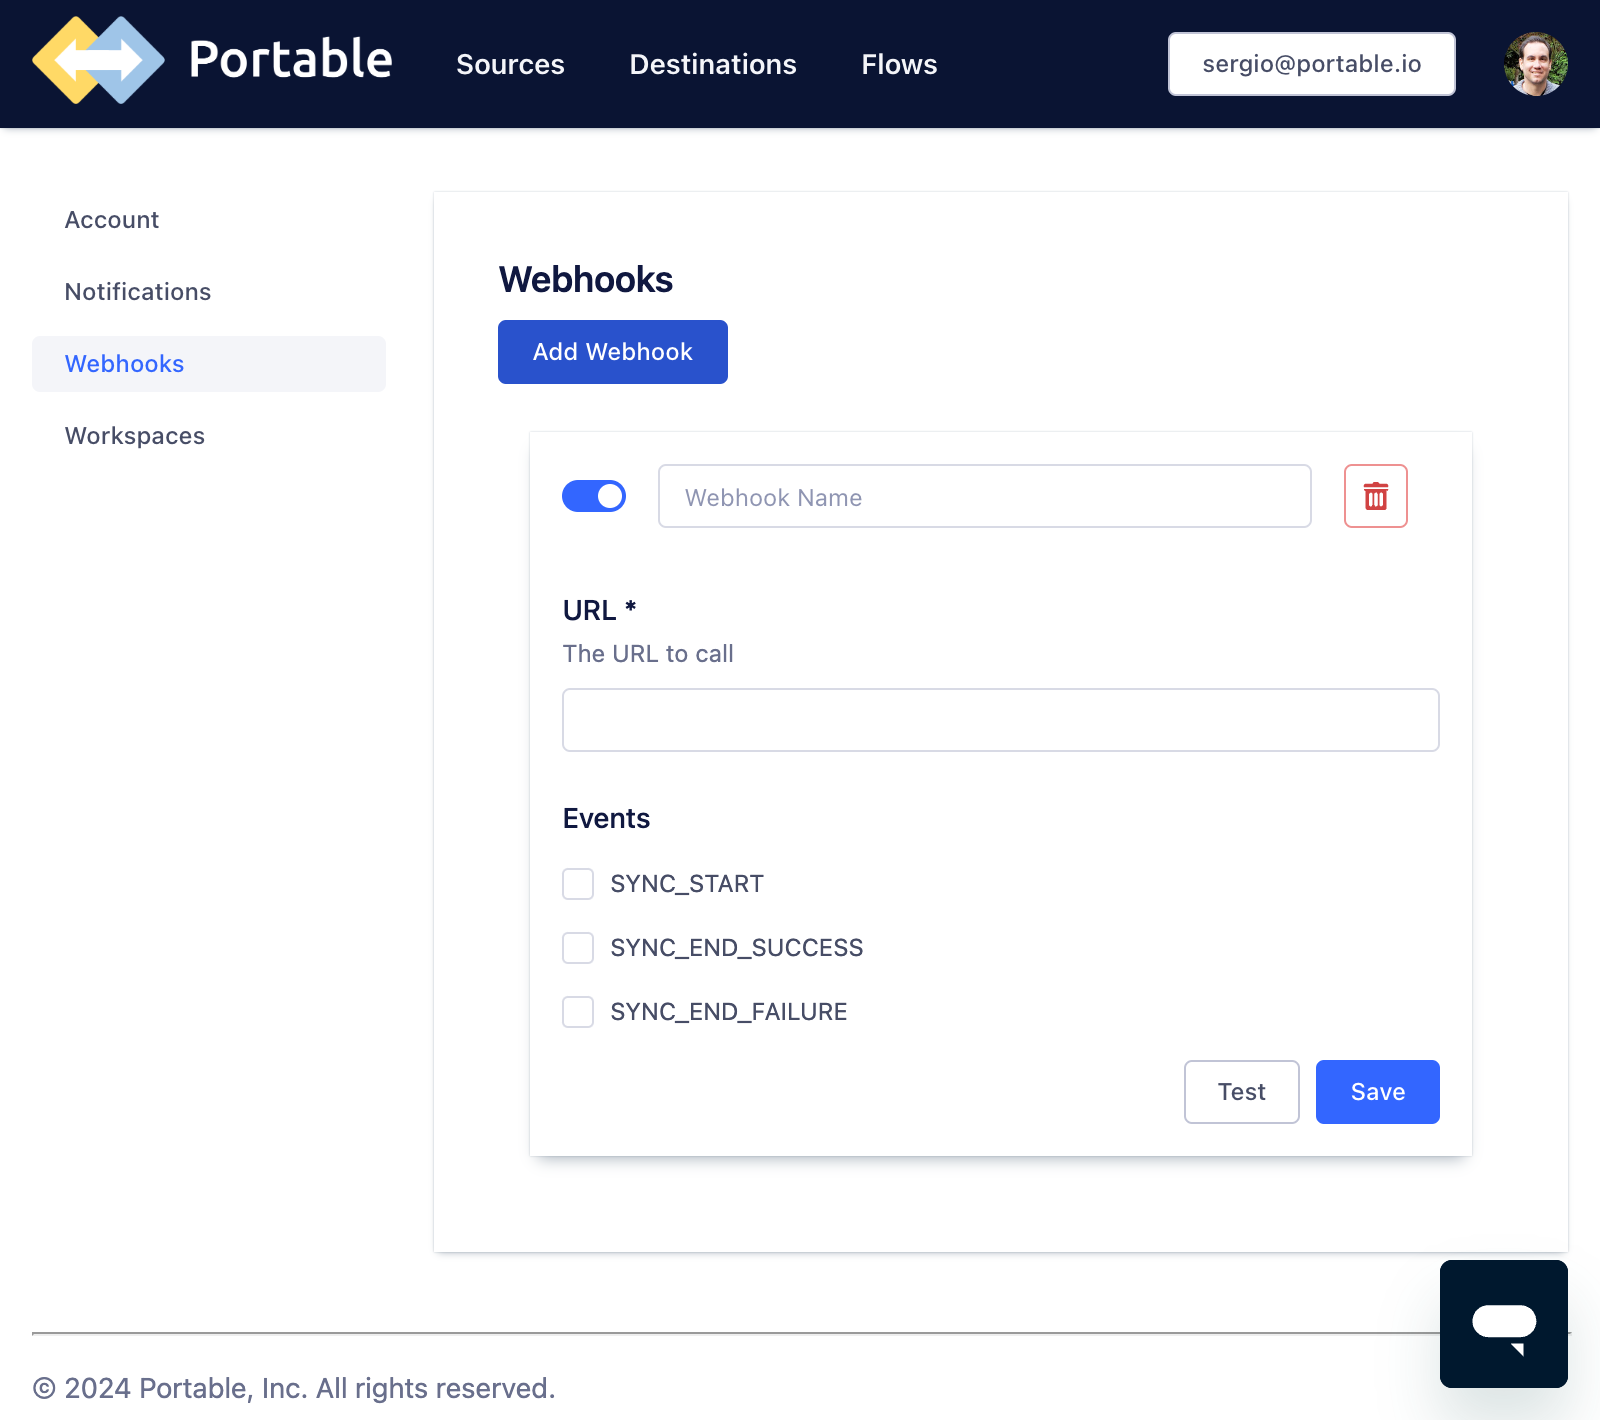
Click on the Add Webhook button to create a new webhook. This is what it'd look like:
Prepare your backend to receive webhook calls
You need to provide a URL for your webhook. What this would look like in practice will depend on your infrastructure. It can be something like a lambda function proxied by an API Gateway if you're using AWS, or a Google Cloud Endpoint in front of a Google Cloud Function if you're using Google Cloud. Whatever mechanism you use, it should be prepared to receive HTTPS POST requests from our public IP address (34.122.15.109).
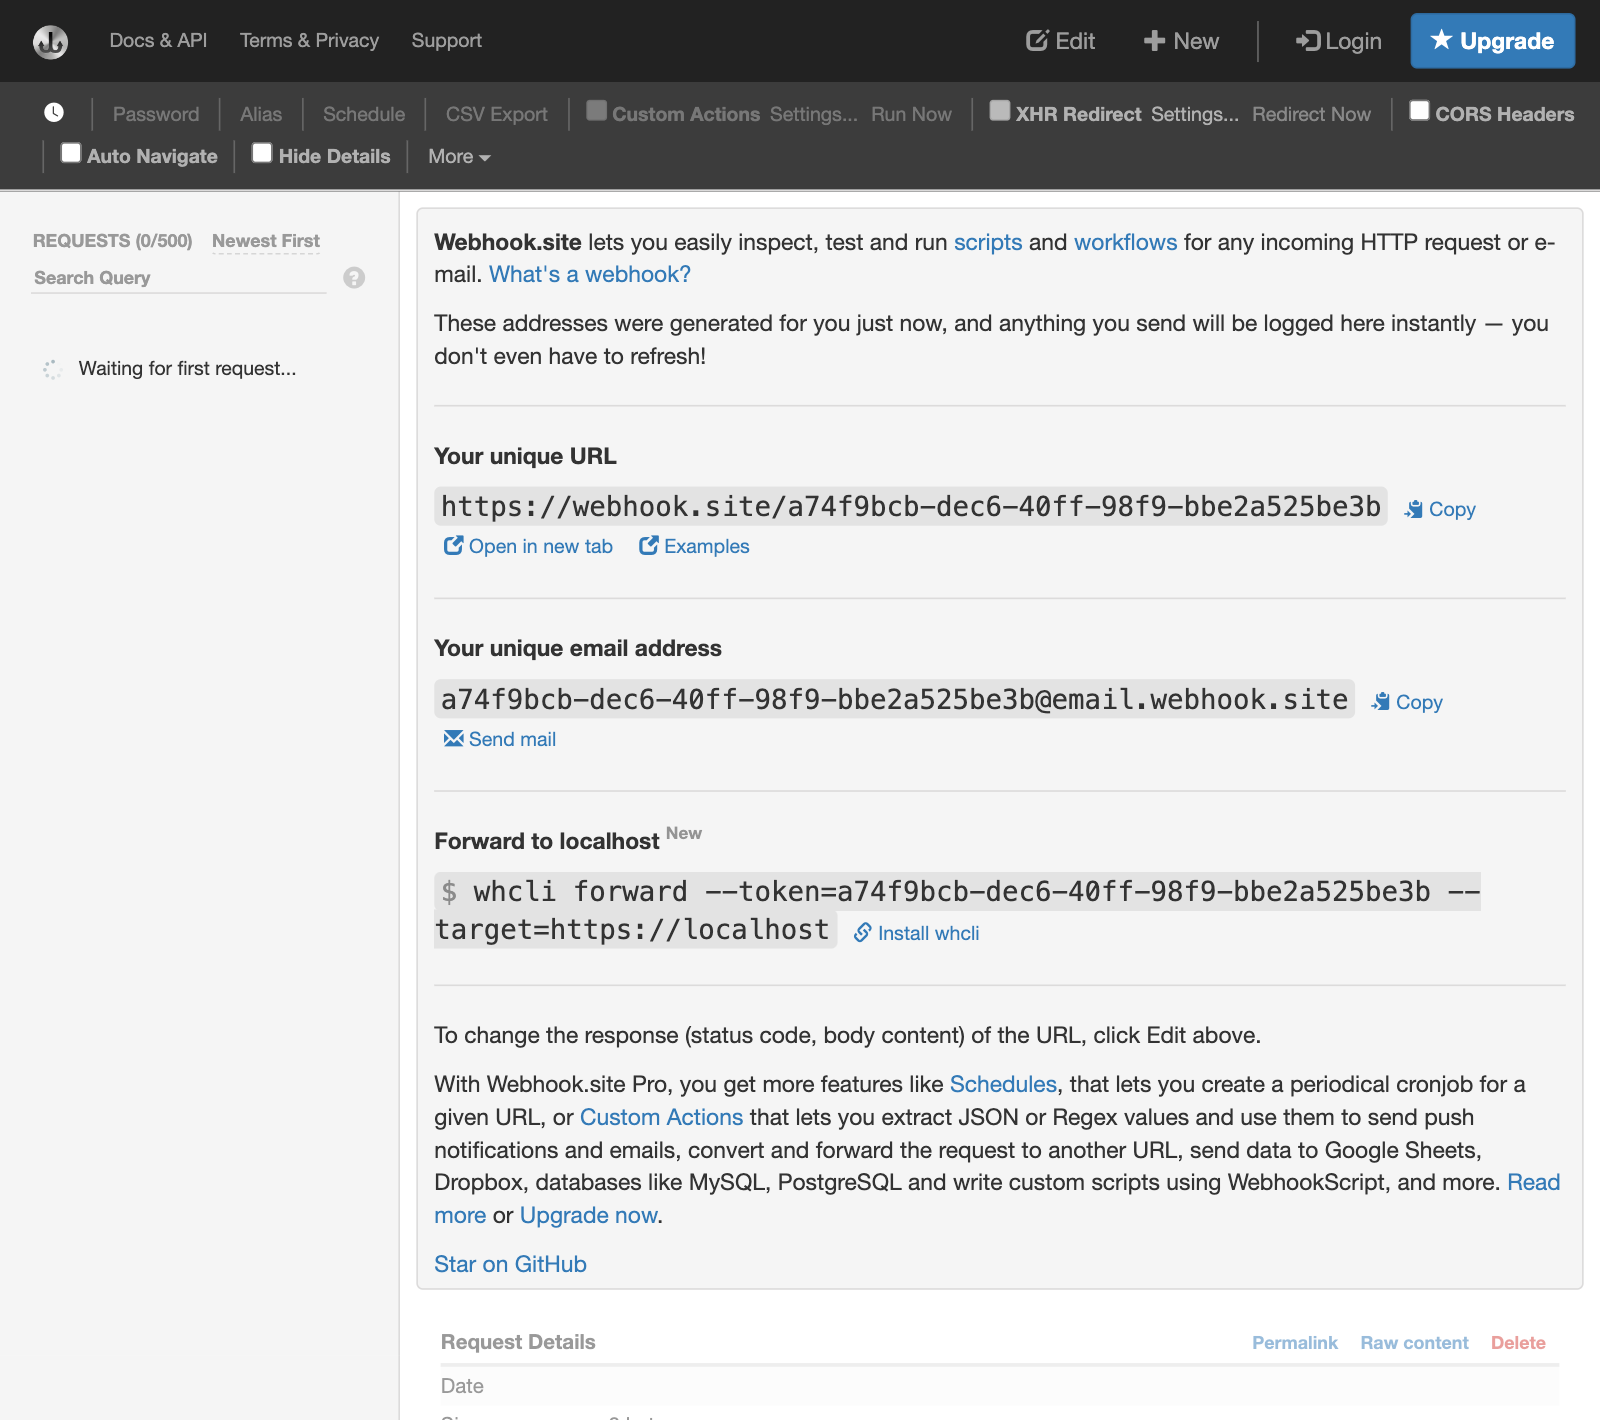
Here I'm going to show you how to use an online tool to view the content of your webhook's payload. Open https://webhook.site in your browser. You should see something like this:
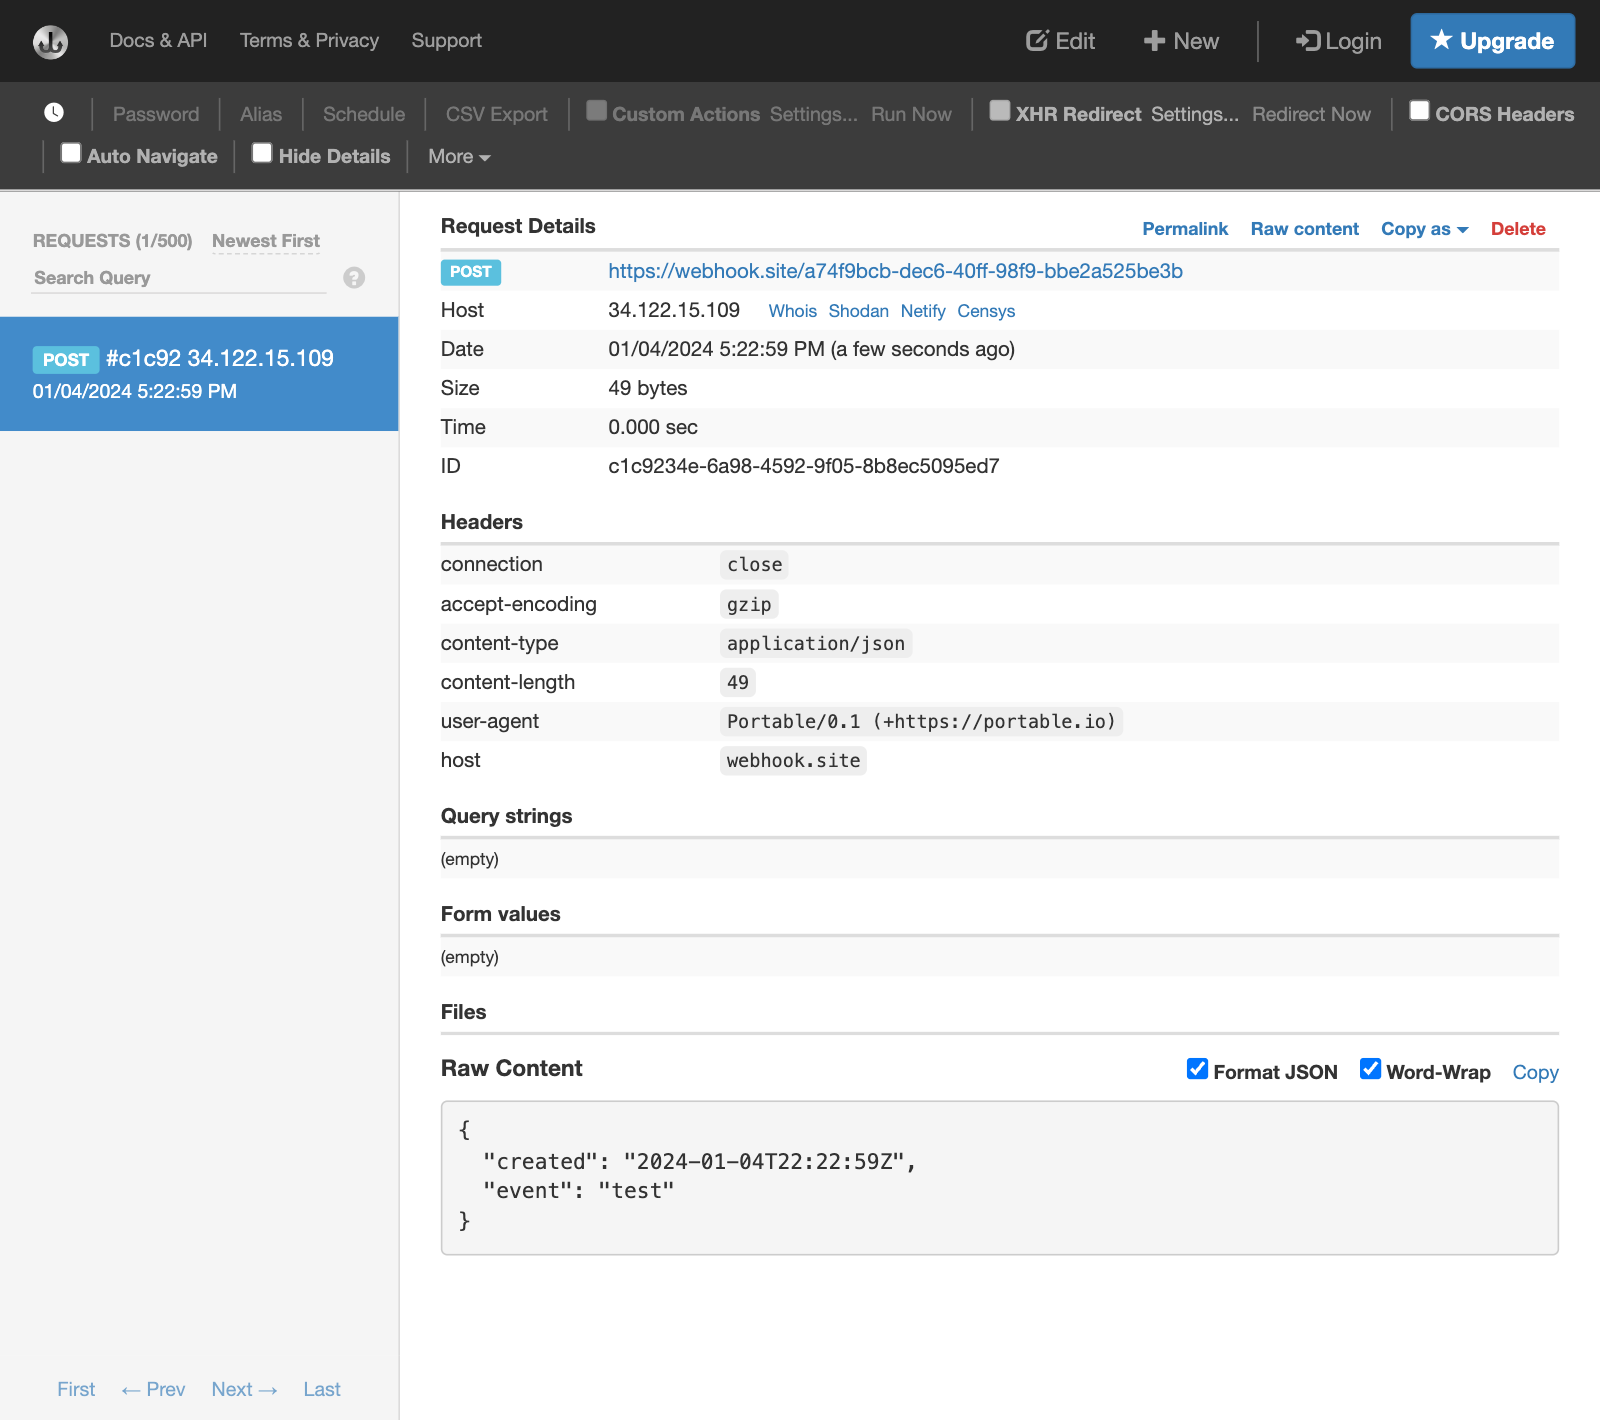
Click on the Copy button next to the header that reads Your unique URL. Paste this URL in the URL field in your Webhook settings page in Portable. Now click on the Test button to send a test HTTP call to this URL. You should be able to see the payload for this test call in the webhook.site tab in your browser:
Configure your webhook
Now go back to your Portable tab and give your webhook a name. Note the enable switch right to the left of the Name of your webhook. You can use this switch to enable/disable your webhook.
A word about events
There's one more thing that you need to configure. You need to select which events will trigger HTTP calls to your webhook. There's a list of available events right below the webhook URL. You can opt to receive calls for these events:
- When your flow starts
- When your flow successfully ends
- When your flow fails
Select the one(s) you care about from the list. Click on the Save button to save your webhook.
Congratulations! You have just set up your first webhook. It will get called for your selected events whenever any of your flows run.
The payload
Here's an example of the body of the POST request that your webhook may receive:
{
  "created": "2024-01-04T22:52:01Z",
  "destination_id": 8583875986,
  "destination_type": "bigquery",
  "event": "sync_start",
  "flow_id": 6953148655,
  "run_attempt_id": 28465238966,
  "source_id": 36583775648,
  "source_type": "hubspot_crm"
}
And here's another example, this time for a "sync_end" event:
{
  "created": "2024-01-04T22:52:21Z",
  "destination_id": 8589936986,
  "destination_type": "bigquery",
  "details": "sync completed successfully",
  "event": "sync_end",
  "flow_id": 6953148655,
  "run_attempt_id": 21475708966,
  "source_id": 30064775648,
  "source_type": "hubspot_crm",
  "status": "SUCCESSFUL"
}
Here's an explanation for each of these fields:
- created: This is the creation date for the event, in RFC 3339 format
- destination_id: The ID of the Destination that holds the data for the flow (e.g. your Snowflake instance)
- destination_type: The type of your Destination
- details: (optional) Additional details about the event that triggered the webhook
- event: The type of the event. E.g. "sync_start", "sync_end", "test".
- flow_id: The ID of the flow that triggered this event
- run_attempt_id: The ID of this attempt to run your flow
- source_id: The ID of the Source of the data for this flow
- source_type: The type of your Source
- status: (optional) An additional status for "sync_end" events. Use it to determine whether your flow succeeded or failed
What happens if a call to your webhook fails?
Sometimes Portable triggers a webhook and the HTTP call fails (it receives an HTTP response code other than 200 OK). It will be retried using exponential backoff for up to 24 hours. What this means in practice is that each subsequent retry happens after a longer delay than the previous one. The time between these attempts gradually increases, reducing the load on the server and increasing the chances of a successful call. The first retry might be in a few seconds, the next could be in a few minutes, and so on, exponentially, until the 24-hour limit is reached. This approach helps to manage server issues or temporary network problems, giving your system a better chance to process the webhook request successfully.